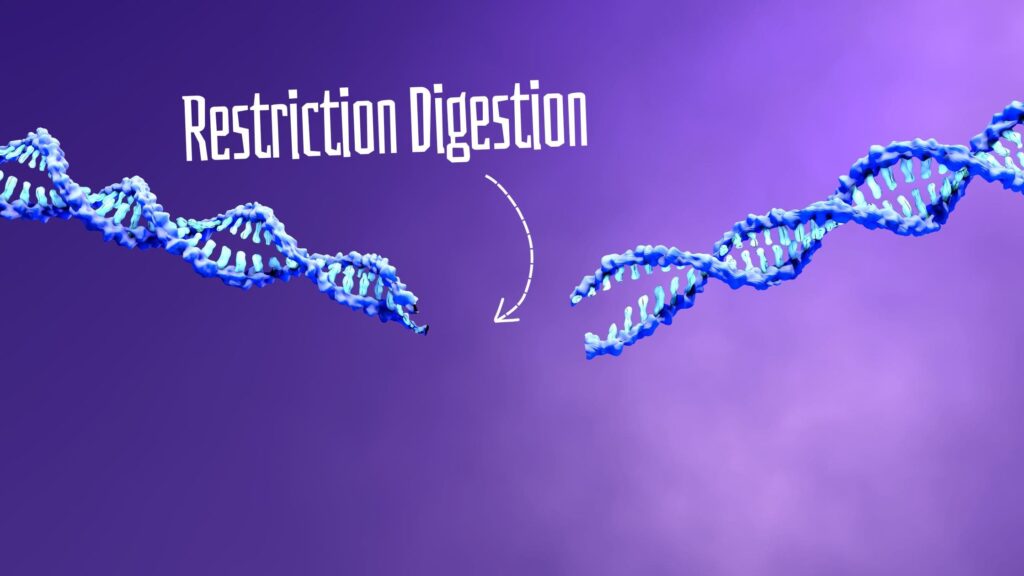
“A plasmid restriction map can be generated and read using an NEBcutter tool provided by the NewEngland labs. This article is a demonstration for generating and reading a plasmid map.”
A plasmid is a small, circular, double-stranded bacterial DNA. It’s present in the cell cytoplasm and carries some crucial genes too. It can replicate independently at a rapid speed. So it is used in molecular genetic experiments.
A plasmid is a crucial constituent of recombinant DNA technology and genetic engineering. Scientists often use it to transfer the gene or DNA sequence of interest to the host organism.
What scientists do is, they digest a selected plasmid with a restriction enzyme, incorporate a gene of interest, seal it and transfer it into host cells. Plasmids replicate in the host cell and incorporate the target gene in the host genome.
However, the process is more complex than it looks! Much dry and wet lab work is involved in the process. Generating a plasmid map is one such dry lab work. It will give us an idea of all the potential plasmid restriction sites.
In this article, I will give you a demonstration of how you can generate a plasmid map. As you are a novice and new to this thing, I will also explain how you can read the map. This is going to be your first step in the field of genetic research.
Stay tuned.
Related article:
- A Guide To Read and Understand Restriction Digestion Gel Results.
- A Well-Established Protocol for Restriction Digestion
Key Topics:
What is a plasmid map?
A plasmid map is a graphical representation of a plasmid showing all the important information needed. An ideal plasmid map should contain information like plasmid size, replication origin, restriction sites and gene locations.
In genetic engineering, we prepare a plasmid map to know,
- How many restriction sites does a plasmid contain?
- How many cutting sites are present for a restriction enzyme?
- How many coding genes does the plasmid contain?
- Where can we potentially cleave the plasmid?
- Where can we incorporate a gene of interest?
How to generate a plasmid map?
Now for this tutorial, we will use the NEBcutter tool. NEBcutter is a tool designed by New England Biolabs. It’s one of the best tools for doing computational (dry lab) work on plasmids and restriction enzymes.
First go to Google and type, “NEBcutter” and click on the very first link. Or you can type https://nc3.neb.com/NEBcutter/ this link in the search box.
Before moving ahead, check out the authenticity of the tool.
- Check the New England Biolabs logo on the right-hand side.
- Investigate if the link is correct or not.
- Check out the SSL certification. The ‘lock’ ahead of the link.
- Check out the overall look of the tool.
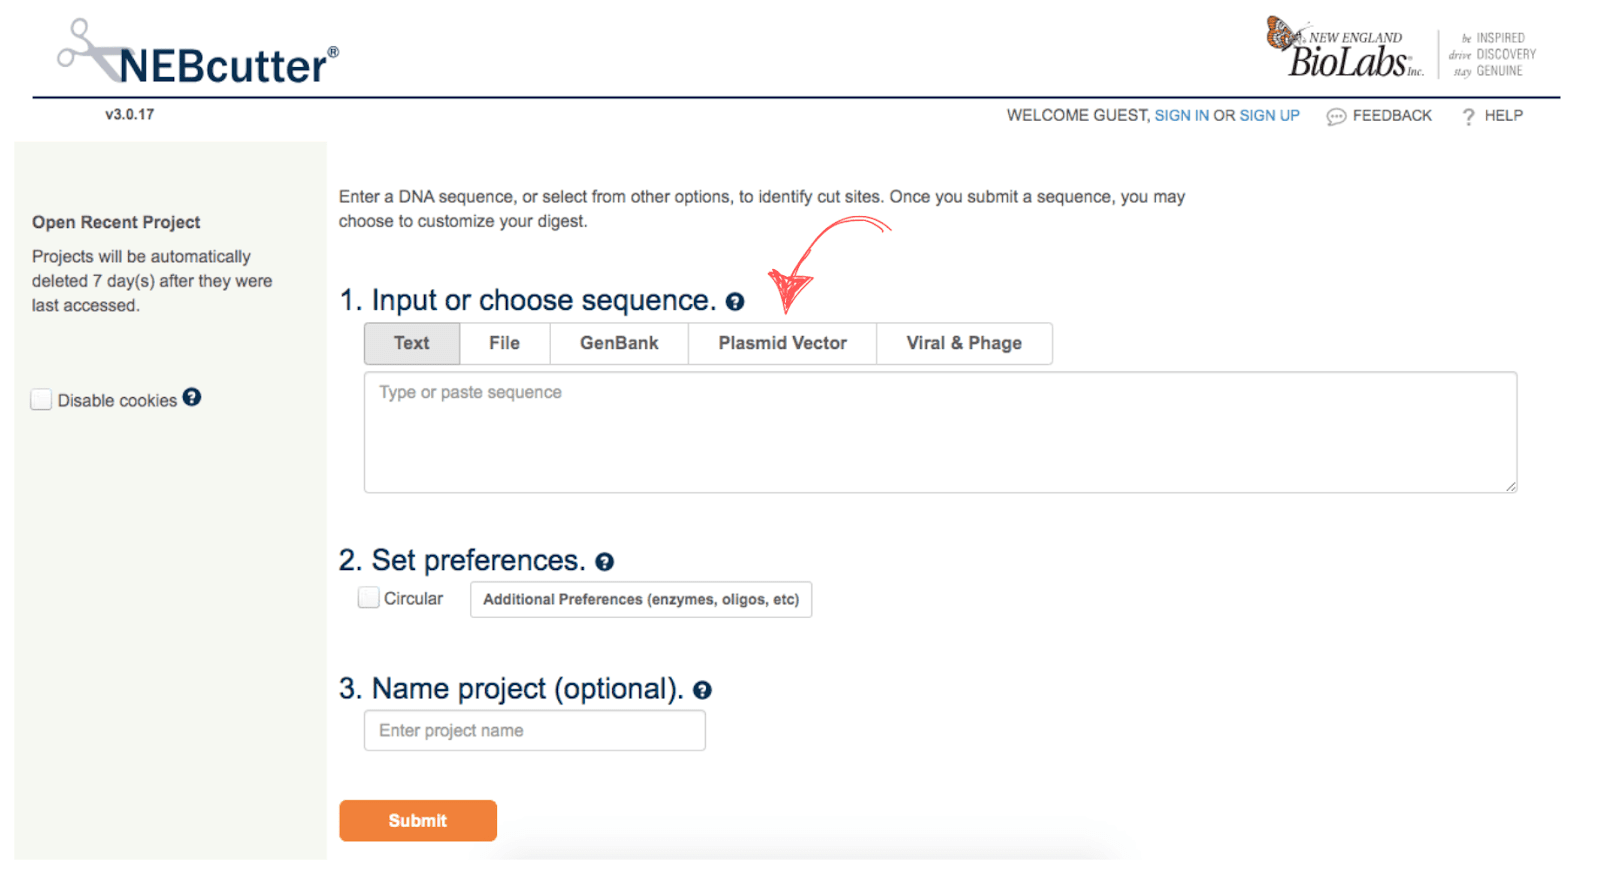
Ok. You will first observe the option of’ “Input of Choose sequence.” As we are preparing the plasmid map. Select ‘plasmid vector’ (4th option).
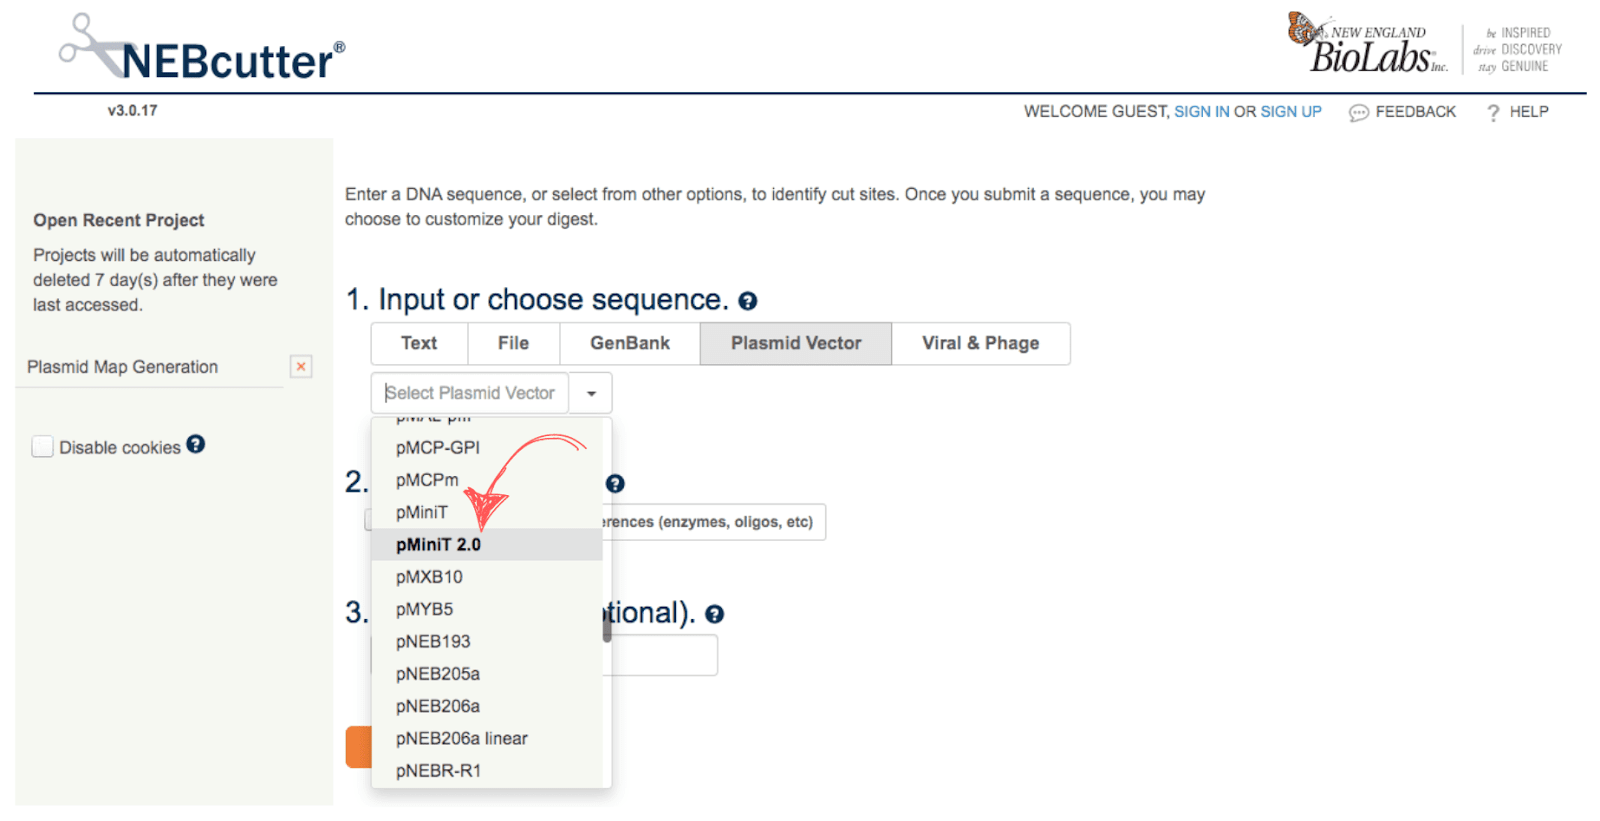
Immediately, the select plasmid window will pop up. For the present demonstration, we will select pMiniT 2.0 from the drop-down menu.
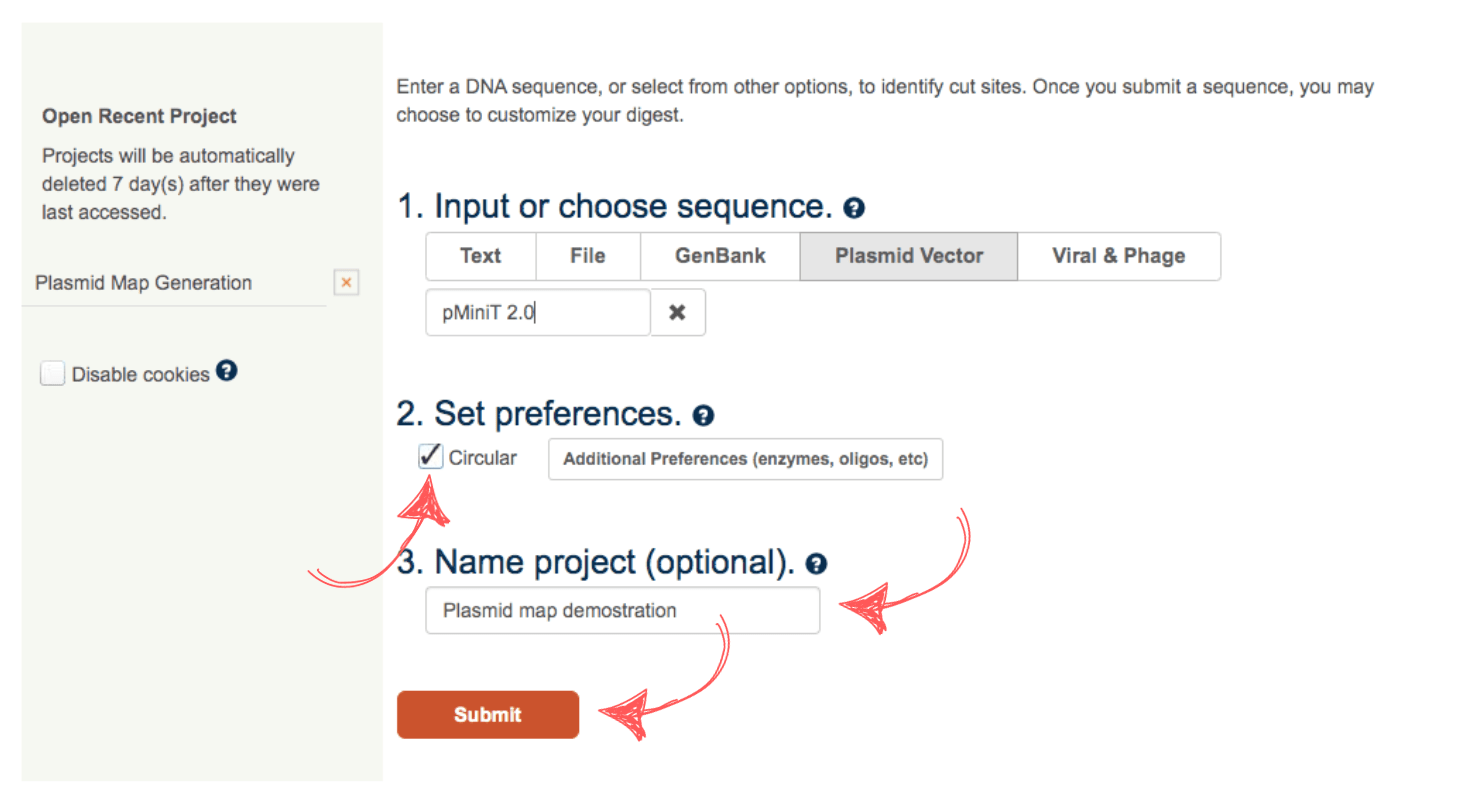
Now, set preference as “circular.” Name the project, “Plasmid map demonstration.” and click on the “submit button.”
Now, our plasmid map is ready. By default it is set to “circular.” you can also choose a linear option if required.
On the sidebar, you can observe the many other options from which you can choose a custom digest option for customized digestion with a single or two restriction enzymes.
You can also observe results there. It shows the size of the plasmid (2588bp) and GC and AT content (GC = 48% and AT = 52%). Overall, a plasmid is an amazing choice in terms of size and GC content.

In the top left corner, there is an option for download. You can download your plasmid data in pdf.
How to Read the Plasmid Map
Now, we have a plasmid map. To use it effectively you have to understand all the information provided in the tool. So let’s read the plasmid map. Keep in mind that the demonstration that we have performed just gives us information regarding the restriction digestion.
We need more information regarding our plasmid for use in our experiment. What we have to do is, use a ready-made plasmid map to read the results.
Go to NEB.com >> Search for pMiniT 2.0. Then Select interactive tools from the sidebar and click on “DNA sequence map and tools.”
You can get a list of all the plasmids and links for their related information. You can directly use this link as well: https://www.neb.com/en/tools-and-resources/interactive-tools/dna-sequences-and-maps-tool.
Now find pMiniT 2.0 and click on the map.
You may have a pdf and a plasmid map. Now, this map is very useful here.
Let’s start reading the map.
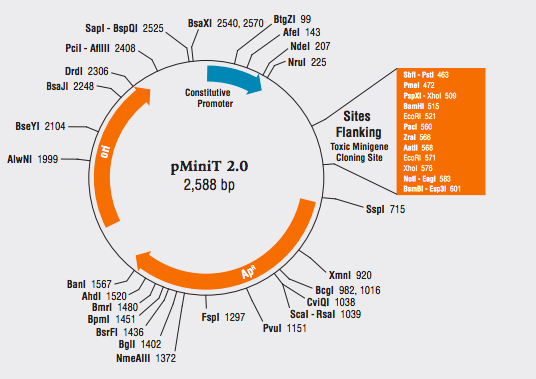
First, note down the plasmid. In the center, you can see pMiniT 2.0. So it’s the same plasmid that we want to read.
Now note down the plasmid size. It’s 2,588 bp. Ok, the same size we observed in the NEB cutter. So the size is correct.
“Ori” here (the orange arrow) is the origin of replication from where the replication initiates.
The blue arrow is a constitutive promoter that helps in the transcription.
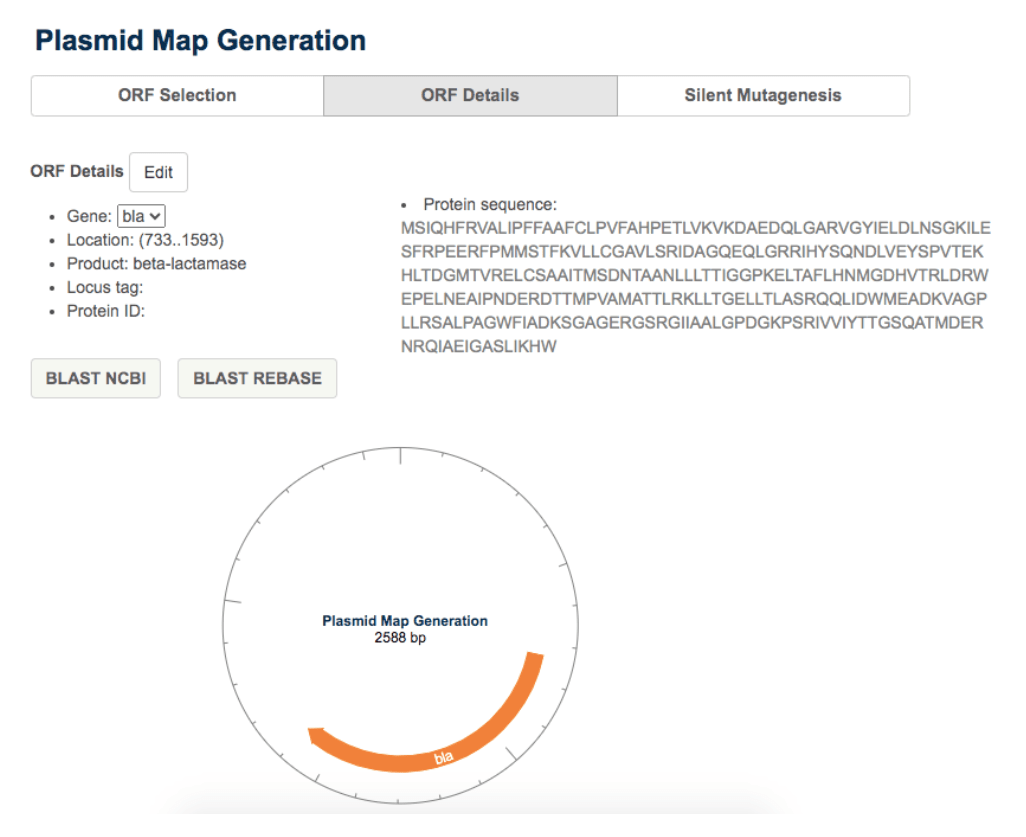
And the large APR is an antibiotic-resistant gene. When you hover the cursor in the Nebcutter, on this site, you can see that it’s a beta-lactamase gene.
The flanking site used for the gene cloning and the list of enzymes to cleave it are also shown in the map.
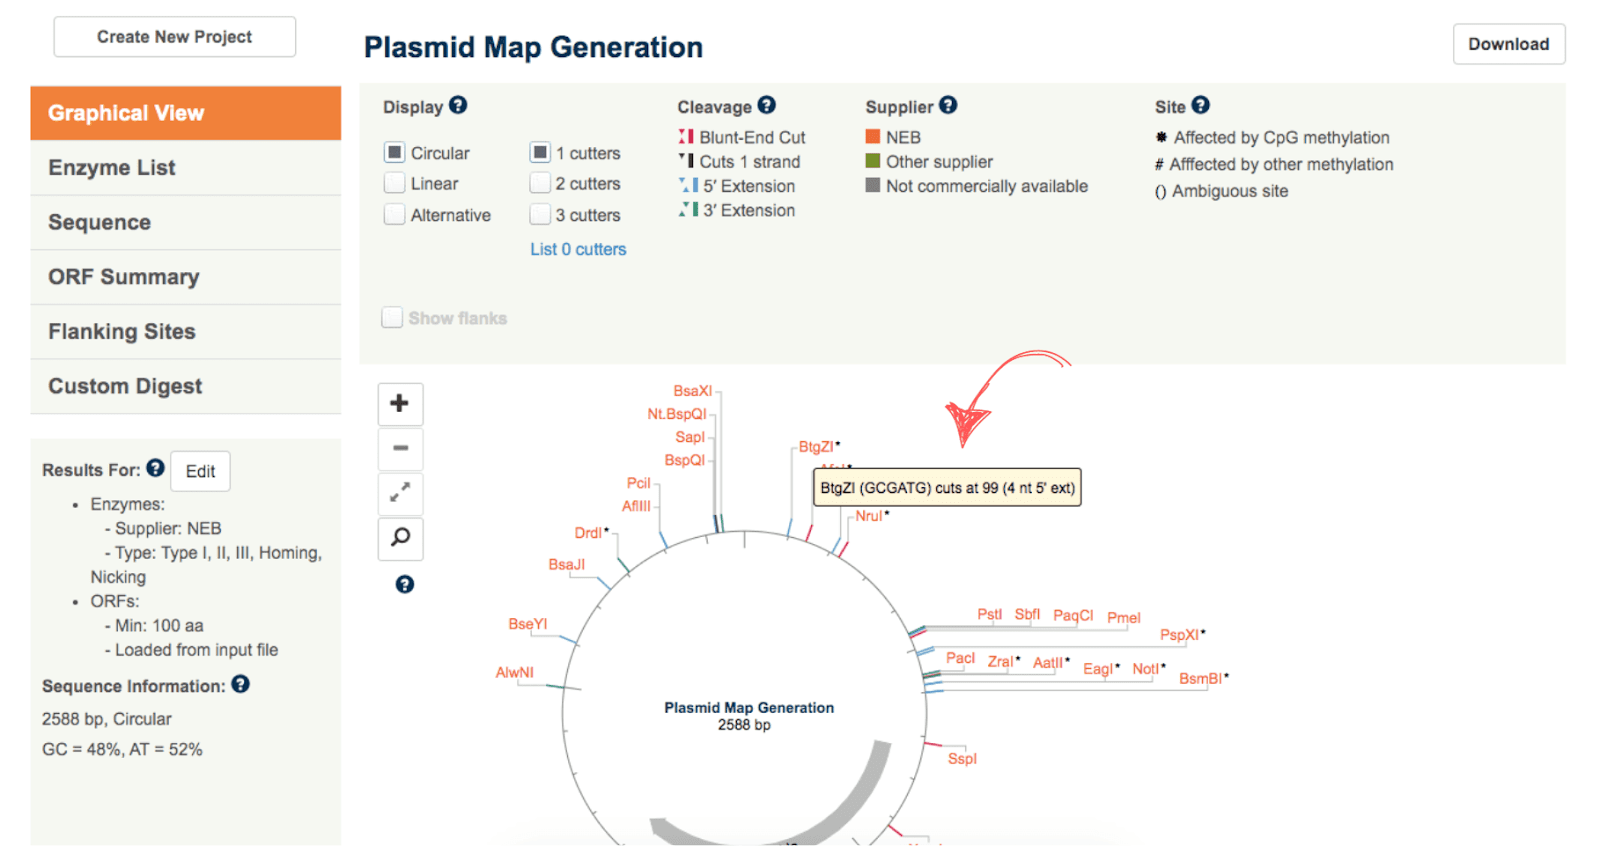
The list of all the possible restriction enzymes is also given on the circular plasmid. When you hover over it you can also see their recognition sequence and site. For example, when you hover over the enzyme BtgZ1 you can see its recognition site GCGATC at position 99.
If you want to read the map more comprehensively, you can click on the beta-lactamase gene and you get related information– protein sequence, location, and options for NCBI BLAST.
Besides these, there are options regarding plasmid linearization, a List of enzymes, ORF and costume digestion. All these options are explained in the video.
Wrapping up:
In conclusion, preparing and reading a plasmid map is a crucial step in any genetic engineering experiment. And it certainly makes things easy for the experiment. You can also test your plasmid if it is compatible to use or not.
We will see in the next demonstration how you can do that. Till then, prepare a plasmid map by yourself. And share this article with your research partners.
P.s. Check out our demonstration on How to Choose a Restriction Enzyme.