“Peripheral Blood Lymphocyte Culture is a common Karyotyping technique used for routine chromosomal analysis. This standard karyotyping protocol for PBLC is for you.”
I have spent years in a molecular cytogenetic laboratory and learned many techniques and optimization strategies for various techniques. Karyotyping is one such technique that I use to perform every day.
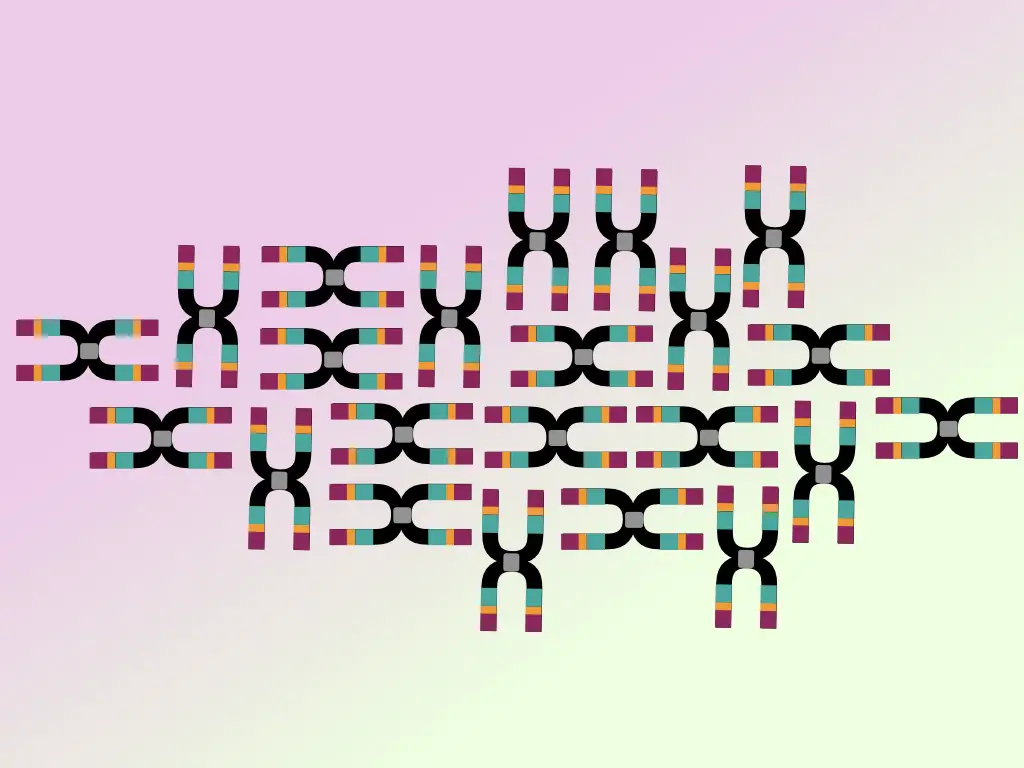
Put simply, it is a diagnostic technique for chromosomal investigation and analysis and thus, we use it for screening suspected samples for Down syndrome and other structural and numerical chromosomal abnormalities.
Trust me, the peripheral blood lymphocyte karyotyping protocol is permanently printed in my mind. Wake me up at midnight and I can perform it without any SOP. Because we have processed thousands of samples.
As our motto at Genetic Education Inc. is to spread knowledge, I am sharing this protocol with you and let me tell you it’s 100% tried, tested and proven. But this time I want a small favor from you.
Check out my latest PCR master course, you can get the link above in this article at our genetic education academy.
Disclaimer: Information provided here is collected from peer-reviewed resources and re-presented in an understandable language. All the sources are enlisted at the end of the article.
Related article: A Brief Introduction To Cytogenetics [Karyotyping, FISH and Microarray].
Key Topics:
What is PBLC– Peripheral Blood Lymphocyte Culture?
Now, before discussing the protocol, it’s important to discuss the PBLC. PBLC stands for Peripheral Blood Lymphocyte Culture in which we culture the blood in the lab. A type of white blood cell– lymphocytes is cultured due to its rapid diving nature.
What we do is we culture the blood cells (lymphocytes), and arrest them at metaphase, because chromosomes appear during this stage and harvest them for analysis. So this is a basic foundation of the PBLC karyotyping process.
Requirements:
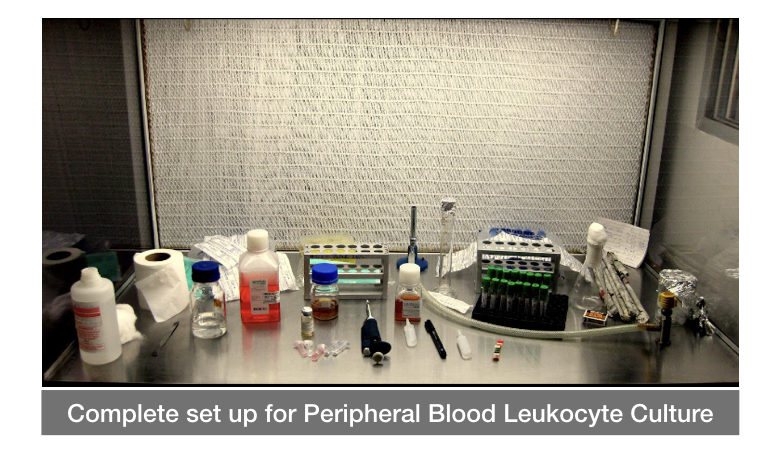
Utilities:
15ml falcon tubes, heparin tubes, culture flask, micropipette, pasteur pipette, 1 to 10 ml pipette, beaker, mouth cap, head cap, gloves and tips.
Chemicals:
Alcohol, methanol, Glacial acetic acid, RPMI-1640, Streptomycin, penicillin, L-glutamine, EtBr, colchicine or colcemid, KCl, Giemsa, trypsin and water.
Instruments:
Laminar airflow or class III safety cabinet, centrifuge, microscope, incubator and refrigerator.
Chemical preparation:
100mg/ml Penicillin:
Dissolve 100 mg of penicillin in 1000µl of sterile distilled water. Store in a cool place.
100mg/ml streptomycin:
Dissolve 100 mg of streptomycin in 1000µl of sterile distilled water. Store it in a cool place.
200mM L-glutamine:
Dissolve 0.029gm of L-glutamine in 1000µl of sterile distilled water. Prepare freshly just before use.
1 mg/ml EtBr:
Dissolve 1mg of EtBr in 1000µl of sterile distilled water. Store in a cool place.
2mg/10ml of colchicine:
Dissolve 2 mg of colchicine in 10 ml of sterile distilled water. Store in a cool place.
Hypotonic solution (0.56% KCl):
Dissolve 0.56 gm of KCl in 100 ml of sterile distilled water. Prepare it just before the use (pH 7.2 to 7.4).
Fixative:
Mix three parts of methanol and 1 part of glacial acetic acid, prepare it at the time of use, and chill it properly at -20℃.
Giemsa stain solution:
- Dissolve 1 gm of Giemsa in 66 ml of glycerol. Mix it using the mortar and pestle for 45 minutes.
- Transfer it to the aluminium foil-wrapped flask and heat steer for 45 minutes to 1 hour.
- Place it at room temperature for some time and add 84 ml of methanol to it.
- Again steer it for 1 hour.
- Place at room temperature for some time and transfer it to the dark amber bottle.
- Our stock solution of Giemsa is ready.
- Before use, mix 5 ml of stock Giemsa solution with 45 ml of distilled water.
Tips: All the chemicals are now available in ready-to-use form, so no need to prepare them. You can purchase it directly.
Role of each chemical in PBLC:
RPMI 1640:
The RPMI 1640 is a modification of McCoy’s 5A medium which is specially prepared for the PBLC. It is a growth media for the tissue culture which provides all the essential ingredients such as vitamins, inorganic salts and amino acids for cell growth.
L-Glutamine:
The L-glutamine is an essential amino acid required for the cell growth of all mammalian and insect cells. It is used separately because it is unstable, therefore, it must be prepared freshly all the time before cell culture.
Antibiotics:
The cytogenetic tissue culture technique is highly prone to contamination. Bacteria and fungi are common contaminants. Antibiotics prevent contamination. Two common antibiotics commonly used in PBLC are penicillin and streptomycin.
Role of colchicine/colcemid:
To arrest cells at the metaphase, colchicine colcemid has been used. Basically, it prevents spindle fiber formation and consequently, the cells can’t enter into anaphase. We will get a good amount of metaphase cells.
Role of EtBr:
It is believed that adding EtBr before the cell harvesting will release the condensation of the chromosome and loosen the compactly packed chromosomes. Due to this, chromosomes appear more elongated and larger.
Role of the hypotonic solution:
The hypotonic solution allows the intake of water that results in the cell swelling and cell burst. This can help in the separation of chromosomes.
Role of fixative:
Fixative removes debris from cells. Metaphase cells are harvested using freshly prepared fixatives.
Phytohemagglutinin (PHA)-P:
The PHA-P is a mitotic stimulator that promotes cell division during the tissue culture. It is already provided in the cell culture media.
culture. It is provided in the culture medium.
Principle of PBLC:
T-lymphocyte cells cannot undergo cell division further, so adding the mitotic agent PHA-P (already present in the RPMI 1640 medium) stimulates cell division in the cell culture. All the cells are arrested at the metaphase by adding the colcemid or colchicine.
Treating cells with the EtBr, hypotonic solution and fixative will promote chromosomal elongation, cell swelling & bursting and separation, respectively. Chromosomes are observed under a microscope using Giemsa staining.
Related article: Karyotyping: Definition, Steps, Procedure and Applications.
PBLC Karyotyping Protocol:
The Peripheral blood lymphocyte culture method is divided into the following steps:
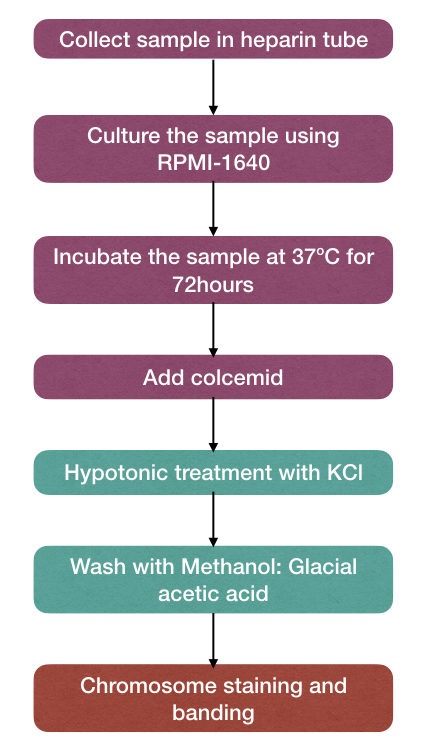
Sample collection:
- 2 ml of the whole blood sample is collected in the heparin tube. Strict aseptic conditions are maintained during the sample collection. The sample must proceed within 24 hours to obtain excellent results. However, avoid disturbing the sample for some time before culture.
Cell culture:
- Karyotyping success depends on how we maintain aseptic conditions during the process. Contamination prevents cell growth and thereby metaphases. So prior to starting the culture process make sure that all the chemicals, utilities, and glass- and plastic wares are free from contamination.
- Wipe the laminar airflow with the alcohol. Wear gloves, mask and head cap. Also, wear a clean lab coat.
- Do not open any of the reagents outside the laminar hood and before cleaning.
- Now clean all the plasticware and glassware and your hands with alcohol.
- Add 7 ml of RPMI-1640 compete-media to the 15 ml falcon tube, Carefully close the bottle and cover it with parafilm.
- Add 100mg/ml 10μl penicillin and 20μl streptomycin antibiotics to the culture tube.
- Add 200mM of 100µL L-glutamine followed by the addition of 100µL of phytohemagglutinin M.
- Now carefully add 0.7ml of a blood sample in the culture tube.
- The culture is mixed well by inverting gently several times and incubated at 37℃ in the incubator for 70 to 72 hours.
- Remember, culture tubes should be placed at an angle of 45 degrees, therefore, the culture can grow efficiently.
Note: The incubator used for the PBLC must be clean and contamination-free also it is very necessary that this incubator will not be used for the bacterial culture.
Tips: The culture must be mixed gently twice a day by inverting the tube.
Pre-Harvesting:
- In the pre-harvesting stage, at the 70th hour of culture, add 100µL of 0.2% colcemid to the culture tube.
- Again incubate it for 2 more hours at the same condition.
Harvesting:
- The culture tube is taken and centrifuged at 3500 rpm for 8 to 10 minutes at room temperature.
- The supernatant is discarded and to the pellet, 0.56% of KCl (called hypotonic solution, prewarmed at 37℃ ) is added.
- The hypotonic solution is added up to the 8 ml falcon tube mark and mixed gently using the pasture pipette.
- Tubes are incubated in the prewarmed water bath at 37℃ for 15 to 17 minutes. The hypo-treatment step varies from lab to lab.
- Immediately after the hypo-treatment, 2 ml of chilled fixative (3 part methanol: 1 part glacial acetic acid) is added.
- Now the mixture is mixed using the same pasture pipette until a brown homogenized mixture appears.
- The tubes are centrifuged at 2500 rpm to 3500 rpm for 8 to 10 minutes.
- The supernatant is discarded and 8 ml of chilled fixative is added again to the pellets.
- Mix it properly and centrifuge at the same speed and time.
- Repeat the fixative-centrifugation step until a clear-white pellet appears.
- Once a clear pellet appears, dissolve the pellet in the 2ml fixative. Now store the tube at 4℃ until the next step.
Slide preparation and Giemsa staining:
- A sterile and pre-chilled slide has been taken and 2 to 3 drops of culture solution are drawn down from the height of ~2 feet.
- A prechilled slide fixes the chromosome faster. Heat the slide by heating the sample gently several times and stain it with Giemsa stain for 5 to 10 minutes.
Again!!
- Heating will fix the chromosome faster, however, care must be taken while heating the slide to avoid damaging chromosomal components.
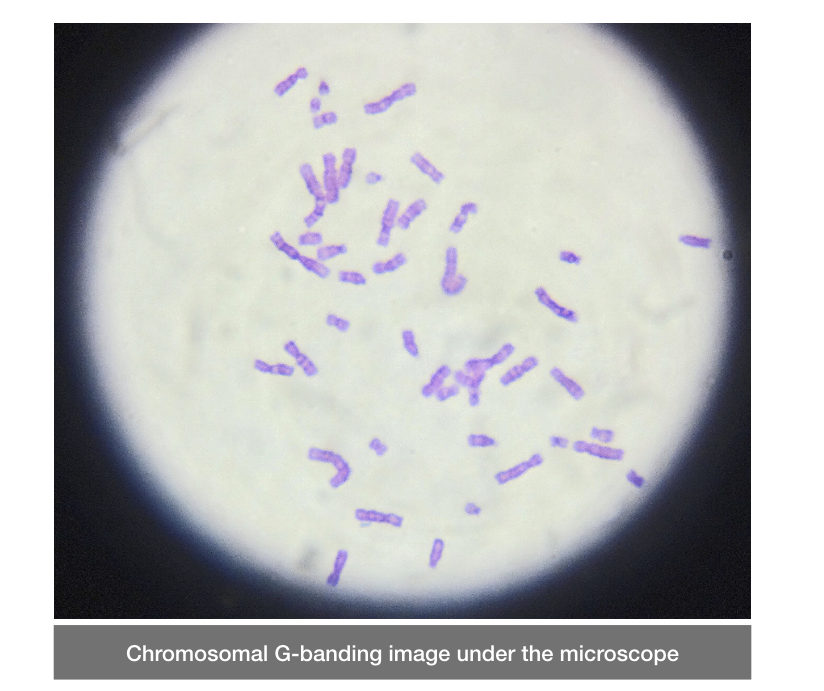
- After staining, the slide is washed with running tap water. Now dry the slides. Observe the slide first in the 10X and then in the 100X under the microscope.
- Target 10 good metaphases from each slide for interpreting results.
Giemsa banding:
- Three or four drops of the cell suspension dropped from a height of 2 feet.
- Age the slide for 3 hours at 80℃.
- Stain slide in 2% Giemsa solution for 5 minutes.
- Deep the slide in the trypsin solution for 10 to 15 seconds and immediately wash with PBS.
- Again stain the slide in the Giemsa solution for some time (continuously stirred) and wash it with D/W.
- Air-dry the slide. Now the slide is ready for microscopic examination.
Wrapping up:
Peripheral Blood Lymphocyte Culture for karyotyping is a bit complex and tedious process. But there is no alternative to it. Since the 80s scientists have been doing karyotyping using the same method.
So to improve your chances of getting into the diagnostic field, you should have to learn karyotyping. Indeed, it’s not that difficult. I hope you like this article. This protocol is tried and tested, and you can use it in your lab.
Read other articles on this topic on our blog.
Sources:
Ozkan E, Lacerda MP. Genetics, Cytogenetic Testing And Conventional Karyotype. [Updated 2023 Aug 8]. In: StatPearls [Internet]. Treasure Island (FL): StatPearls Publishing; 2023 Jan-. Available from: https://www.ncbi.nlm.nih.gov/books/NBK563293/.
Howe B, Umrigar A, Tsien F. Chromosome preparation from cultured cells. J Vis Exp. 2014 Jan 28;(83):e50203. doi: 10.3791/50203. PMID: 24513647; PMCID: PMC4091199.